Actix Web Auto Docs with Utoipa & Swagger-UI
 SubComENGINEERING
Post card from the SubCom engineering blog.
Intro
So you’ve made your shiny new server with all these fancy Endpoints. Now comes the question, How do you tell someone what to access? You could write your own documentation, but that would take far too long, and you would be prone to making errors. A much better solution is to generate the docs from the code you’ve already written.
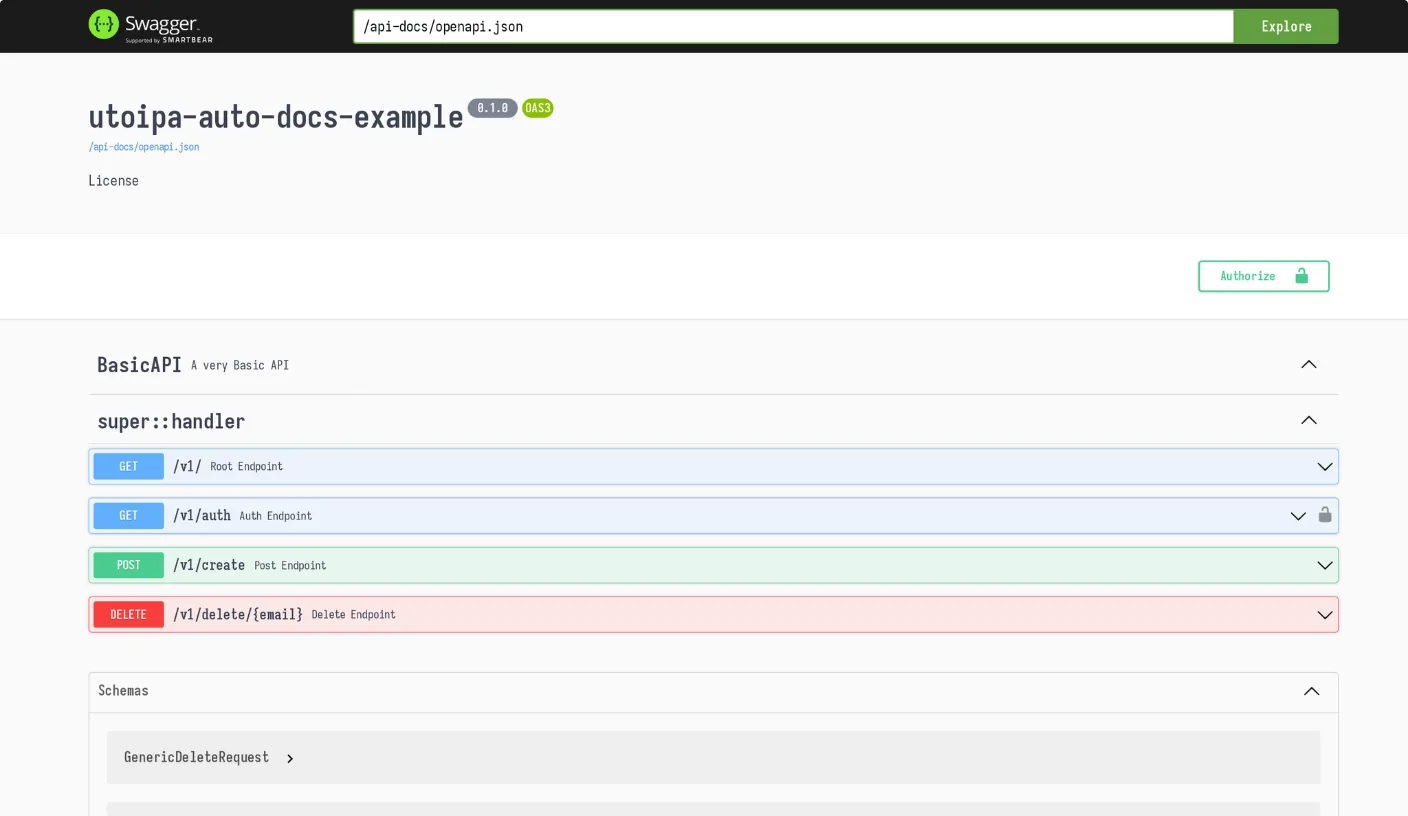
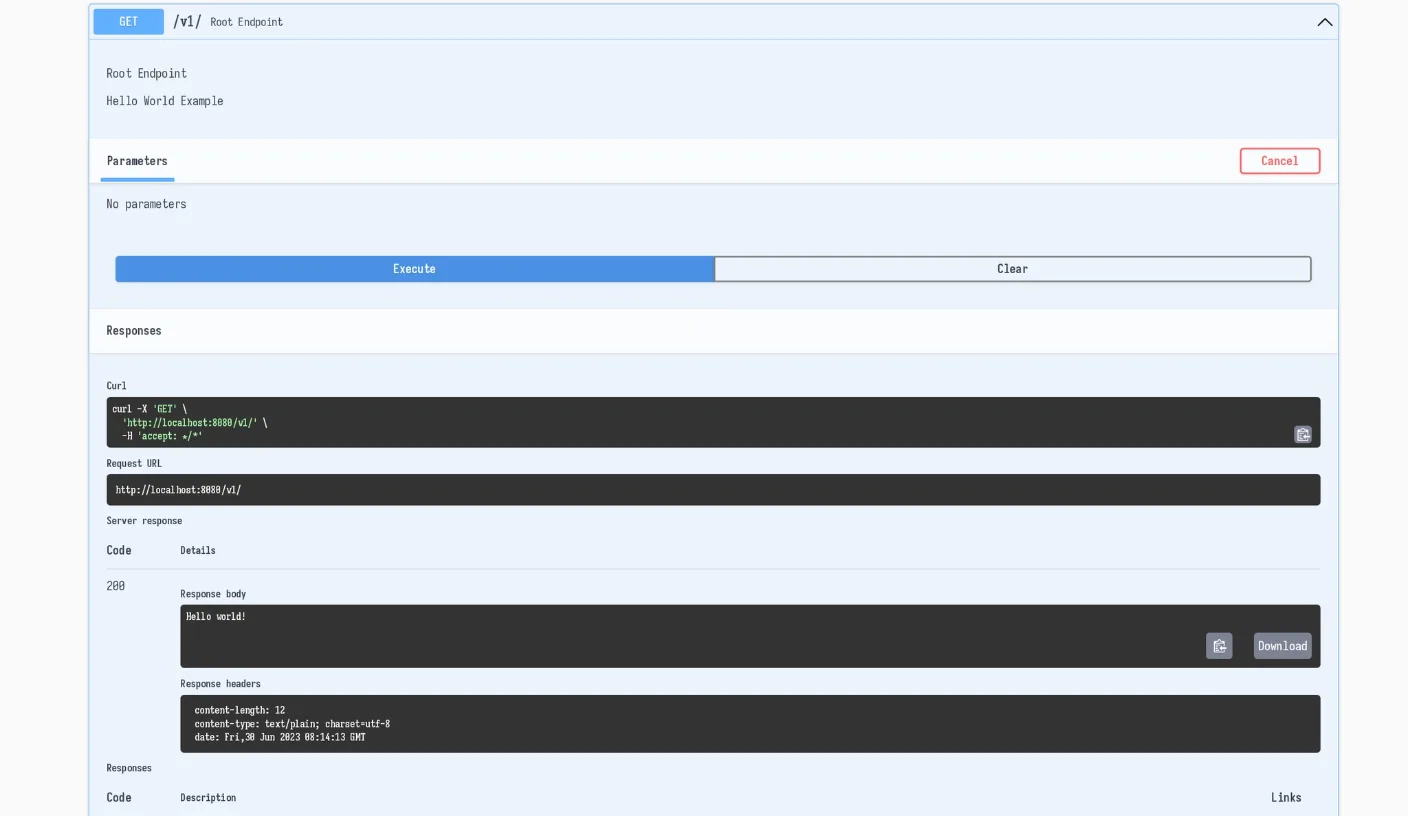
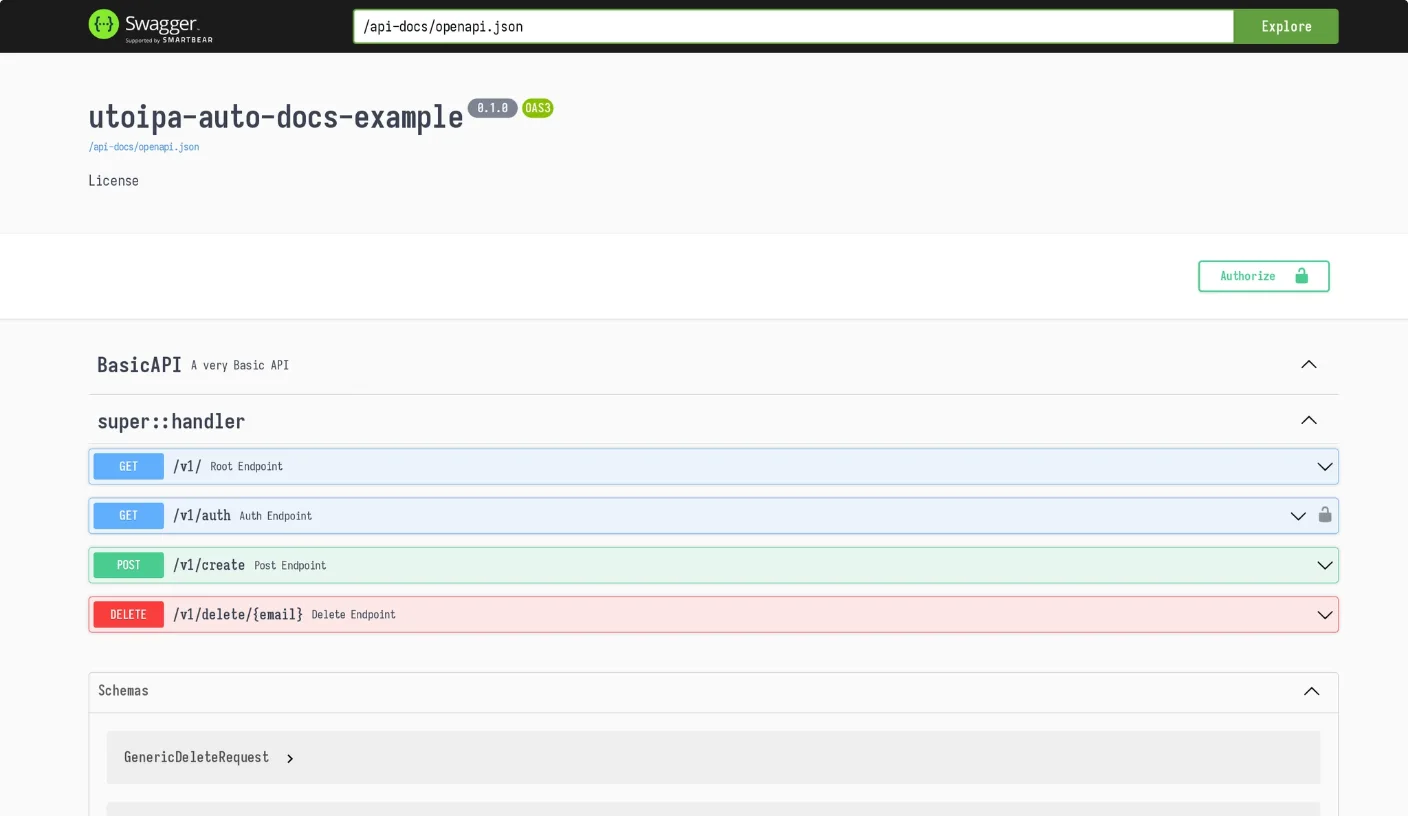
Such is the solution utoipa provides. It describes your endpoints in the OpenAPI standard in JSON, so it can be consumed by a suitable front-end. A front-end like SwaggerUI will display your endpoints so that it can consumed by a user with relative ease. We can bring SwaggerUI onto our server with the utoipa-swagger-ui crate, and it would look like this:
Limitations
The only limitation we’ve come across is that swagger cannot send GET requests with a request body. You’ll have to use query parameters or change it to a POST method.
Actix Web Setup
We’ll being using actix_web but you could just as easily use axum, warp, tide or rocket. The entire project we setup here is available at this Github Repo. This is the structure we’ll be following:
src
├── auth.rs          # authentication extractors
├── handler.rs       # endpoints go here
├── main.rs          # server setup
├── swagger_docs.rs  # swagger setup
└── types.rs         # types w/ some swagger setup
We have the following endpoints setup:
- GET
/v1/- hello world example - GET
/v1/auth- authenticated hello world example - POST
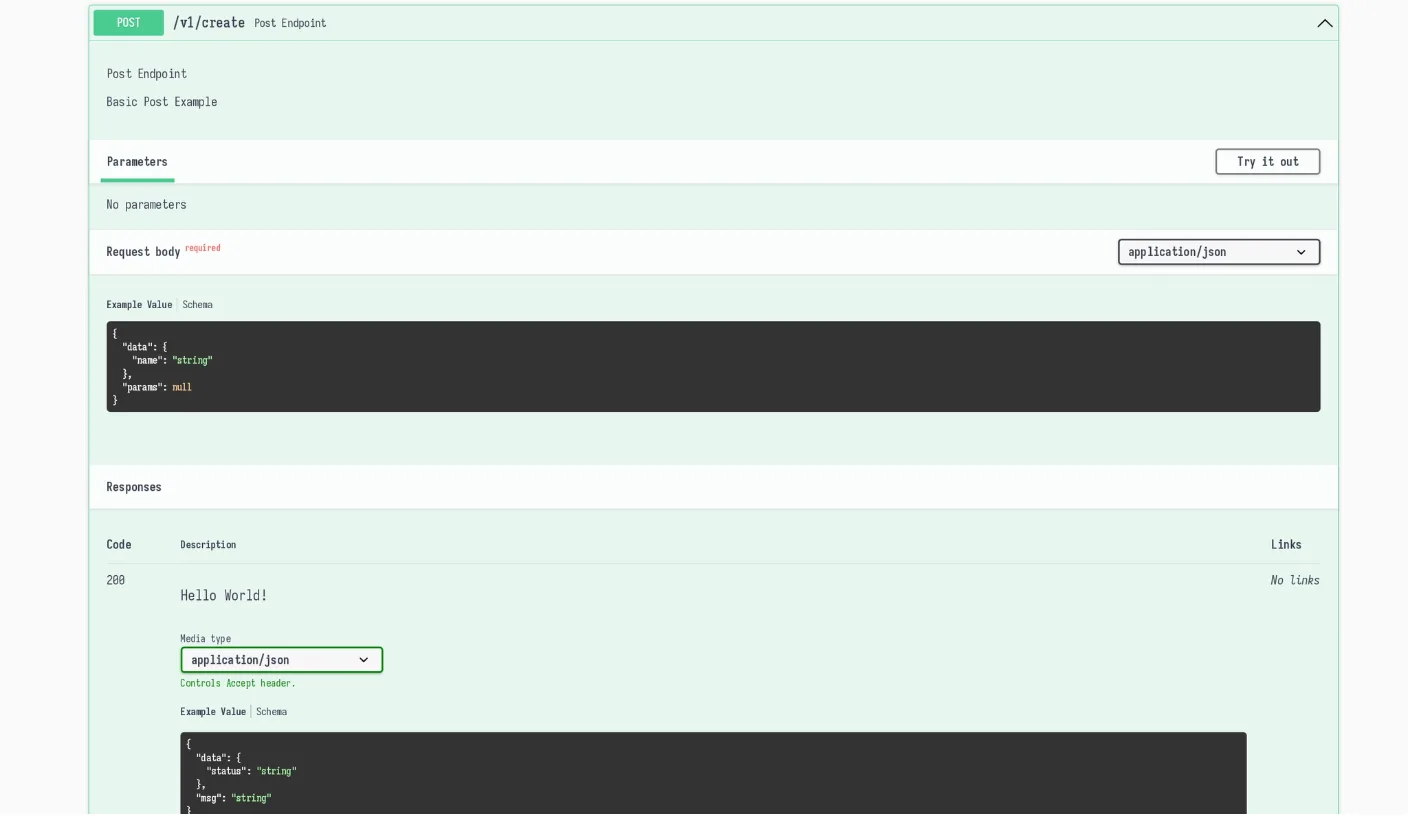
/v1/create- basic post request which returns request - DELETE
/v1/delete/{email}- basic delete request which returns request
Utoipa Setup
we’ll be adding our 2 crates with actix integration features. Additionally we’ll also enable debug-embed in utoipa-swagger-ui so the docs endpoint is included in debug builds as well.
Next in the swagger_docs.rs file we’ll add the documentation struct ApiDoc. This struct will derive OpenAPI proc macro, which will be used to create our openapi.json file which will be used by swagger.
;We’ve also added a couple of attributes as well:
paths- this is where we add our defined endpoints, so it shows up in the json.componentsschemas- where we add out type definitions. More on this later.
tags- information about the APIsmodifiers- We can pass in a struct that implements the Modify trait, which allows us to modify OpenAPI at runtime. We’ll be using this to add security setup, more on this later.
Auth Security
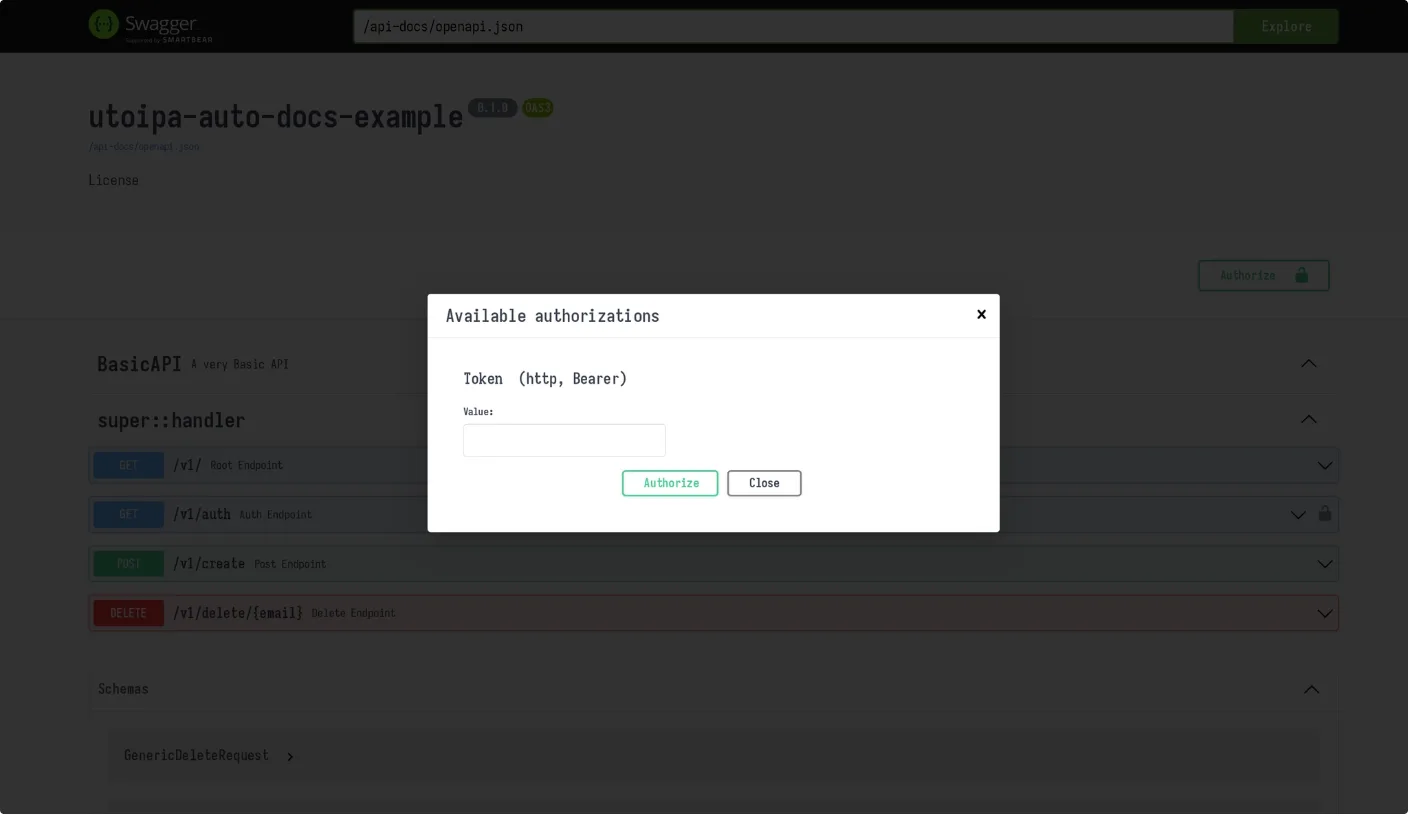
Our GET /v1/auth endpoint uses a bearer token. Utoipa allows us to define this which gives us a convenient way to set it for endpoints that require it. We’ll pass the SecurityAddon struct to modifiers attribute like so:
;
We can add a security scheme called Token, and its type of HttpAuthScheme::Bearer. When documenting our endpoints, we can specify which security the endpoint requires using the name we provide (in this case “Token”).
Types
Before we begin documenting our endpoints, we’ll define our types so it can be parsed and displayed on swagger.
Query
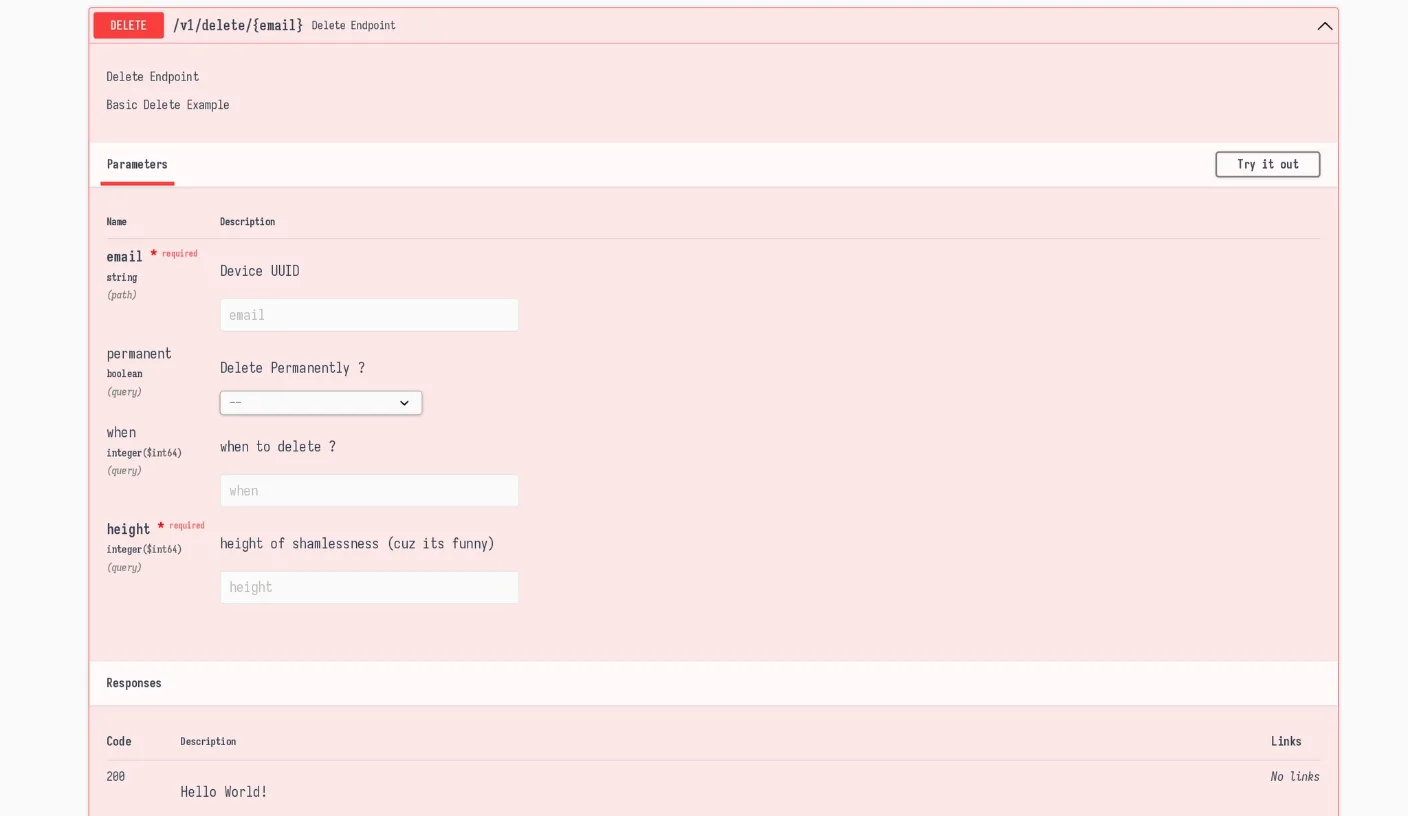
Query Parameters just require the IntoParams trait to be derived. We’ll also add doc comments to define so their descriptions get ported to into json as well.
Path
When defining our Endpoints we can pass the path variables & query parameters in the params attribute like so:
Structs & Objects
All structs that are going to be used for request or response will require the ToSchema trait to be derived (including the structs used within your structs!). Additionally these structs should be included in schemas attribute in the swagger_docs.rs file.
Generics
Suppose we have these Generic Structs:
GenericResponse & GenericRequest Structs
utoipa can’t parse these without defining an alias. Therefore to define GenericResponse<PostResponse> you would have to add the aliases attribute:
Just like with normal structs, you’ll have to import this alias type to schemas attribute, as well as the specified type (in this case PostResponse).
Sometimes you’ll want to pass in a void type (). This can be done using the utoipa::TupleUnit type. It’s just a type alias to (). We can use it like so:
use TupleUnit;
Just as before you’ll have to include the types in schemas attribute, but this time you’ll have to include utoipa::TupleUnit as well.
Documenting Endpoints
Now that we’ve defined our basic building blocks, we can start building our documentation for the individual endpoints. It’ll be in the following structure:
Format for utoipa::path proc macro/// Endpoint Name
///
/// Description
Since we’ve enabled the actix integration flags, utoipa can infer the request type & its path. Context path will be used if we’re scoping or handlers to a path (eg. /v1). In the responses attribute we specify the status code, description & optionally the response body if there is one. request_body, params & security are optional.
There are more options to configure (refer to the docs), and they’ll vary from the framework you’re using and what you want to display.
Showing of your endpoints
Finally its time to show off our fancy endpoints. We can attach a service to our Http Server App which will show SwaggerUI on the endpoint of our choice.
Adding SwaggerUI service to the servernew
.bind?
.run
.awaitWe specify the endpoint URL (in this case /docs-v1/). Then specify the location of where openapi.json is generated (in this case /api-docs/openapi.json) & the ApiDoc::openapi() object.
And when we run & open it on http://localhost:8080/docs-v1/ we’ll be presented with:
References
- https://docs.rs/utoipa/latest/utoipa/
- https://docs.rs/utoipa-swagger-ui/latest/utoipa_swagger_ui/
- https://github.com/juhaku/utoipa/issues/108#issuecomment-1119730448
- https://github.com/juhaku/utoipa/pull/464#issuecomment-1407786147
- https://github.com/juhaku/utoipa/issues/448
- https://github.com/juhaku/utoipa/pull/476